There are two steps we will perform
Start → Run → frmbld
Connect the Oracle Forms Builder with database
File →Connect
Enter User Name, Password and Database and press connect button
We will develop a form using wizard
Right click on Module and choose Data Block Wizard
The Data Block Wizard welcome screen will appear to you and click next button with default options.
Select the type of Data Block like Table/ View / Store Procedure. I will go with default and click next button.
Browse/ type the table or view on which to base your data block. Click refresh button and make sure the columns should appear in available columns list.
Move all the Available columns to Database items list and click next button.
Enter the Name of your block and click next button.
You have finished the data block wizard steps and congratulation screen will appear. Click finished button with default settings.
After completing the Data Block wizard, the layout wizard welcome screen will appear. This wizard will allow you to quickly and easily lay out the item of a data block. The wizard will display the item in a frame on a canvas, and lay them out in one of several styles. Click next to begin creating your frame.
Select the canvas from canvas drop down on which you wish to lay out the data block’s items. Click next button.
Move the entire item from available items list to Display items list and Click next button.
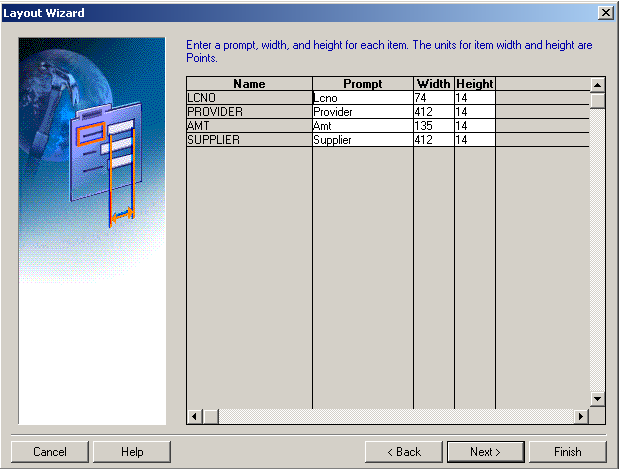
Enter a prompt, width and height for each item. Click next button.
Select the layout style for your frame by clicking the radio button below. I will go with default and click next button.
Enter a title for the frame and be sure to specify the number of database records to be displayed in the frame as well as distance.
If you wish to display scroll in the frame then check the “Display Scrollbar” check box.
Click next button
Save & close it. Click on File menu and click on switch to responsibility and select your responsibility.
- Develop a form using Oracle Forms Builder.
- Register the new developed form with oracle application
Start → Run → frmbld
Connect the Oracle Forms Builder with database
File →Connect
Enter User Name, Password and Database and press connect button
We will develop a form using wizard
Right click on Module and choose Data Block Wizard
The Data Block Wizard welcome screen will appear to you and click next button with default options.
Select the type of Data Block like Table/ View / Store Procedure. I will go with default and click next button.
Browse/ type the table or view on which to base your data block. Click refresh button and make sure the columns should appear in available columns list.
Move all the Available columns to Database items list and click next button.
Enter the Name of your block and click next button.
You have finished the data block wizard steps and congratulation screen will appear. Click finished button with default settings.
After completing the Data Block wizard, the layout wizard welcome screen will appear. This wizard will allow you to quickly and easily lay out the item of a data block. The wizard will display the item in a frame on a canvas, and lay them out in one of several styles. Click next to begin creating your frame.
Select the canvas from canvas drop down on which you wish to lay out the data block’s items. Click next button.
Move the entire item from available items list to Display items list and Click next button.
Enter a prompt, width and height for each item. Click next button.
Select the layout style for your frame by clicking the radio button below. I will go with default and click next button.
Enter a title for the frame and be sure to specify the number of database records to be displayed in the frame as well as distance.
If you wish to display scroll in the frame then check the “Display Scrollbar” check box.
Click next button
You have finished the layout wizard steps and congratulation screen will appear. Now Click finished button with default settings.
After completing the layout wizard the below you will have below screen
Save the form File → Save or press CTRL + S
Here is the screen which define the path.
Run the form press CTRL + R and fill up the data in columns.
Register the form with Oracle Application
Associate form to Application Forms
Application Developer → Application → Forms
Fill up columns as filled in below screen.
Save & close it
Associate form to Application Form Functions
Navigation:
Application Developer → Application → Form Functions
Fill up columns as filled in below screen.
Click on form tab and fill up information
Save & close it.
Associate Function to Menu
Navigation:
Application Developer → Application → Menu
Fill up columns as filled in below screen.
Save & close it.
Define Data Group
Navigation:
System Administrator → Security → Oracle → DataGroup
Fill up columns as filled in below screen.
Save & close it.
Define Responsibility and Assign Data Group
Navigation:
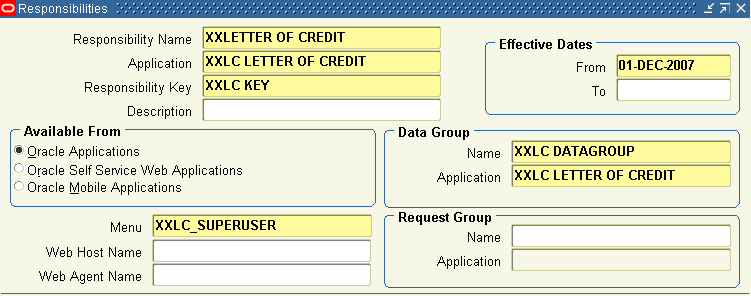
System Administrator → Security → Responsibility → Define
Fill up columns as filled in below screen.
Navigation:
System Administrator → Security → User → Define
Fill up columns as filled in below screen.
Save & close it. Click on File menu and click on switch to responsibility and select your responsibility.
Save it.


